I bought the ugliest curtains I could find.
Not on purpose. I was looking for cotton bedsheets to turn into a dress. Found nothing. But these curtains? Bright blue with weird yellow flowers. Hideous. Perfect.
They were $4. I figured if I ruined them, I lost less than a coffee.
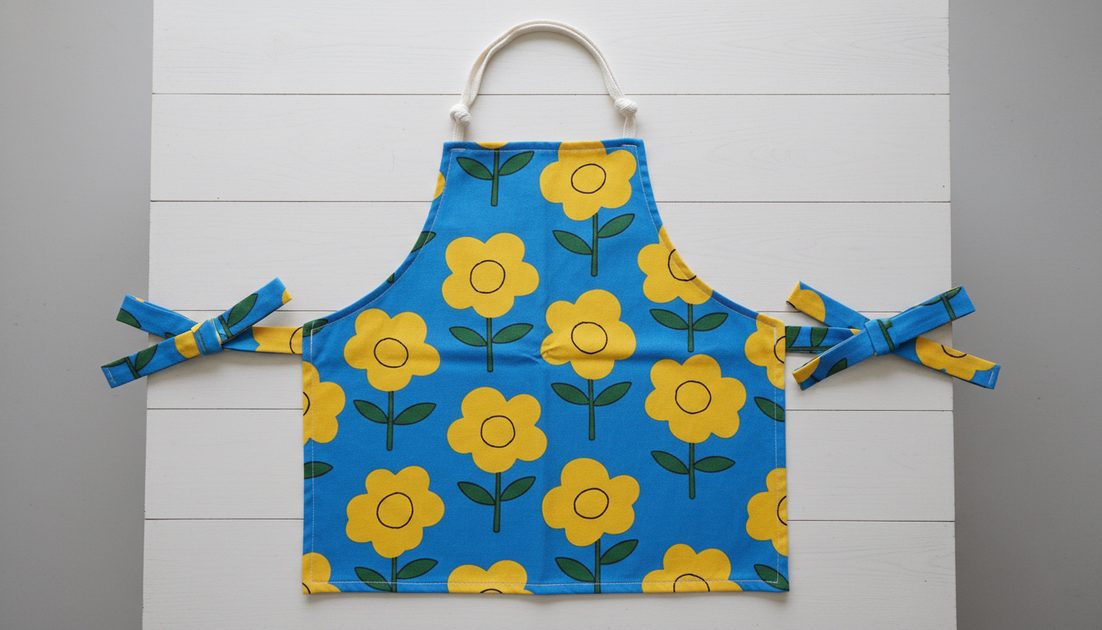
Spoiler: I didn't ruin them. And now I have an apron I actually love.
Why curtains?
Curtain fabric is thick. Heavier than most bedsheets. Almost like canvas, but softer.
The tag said 100% cotton. No stretch. That's what you want for an apron – something that protects your clothes and wipes clean.
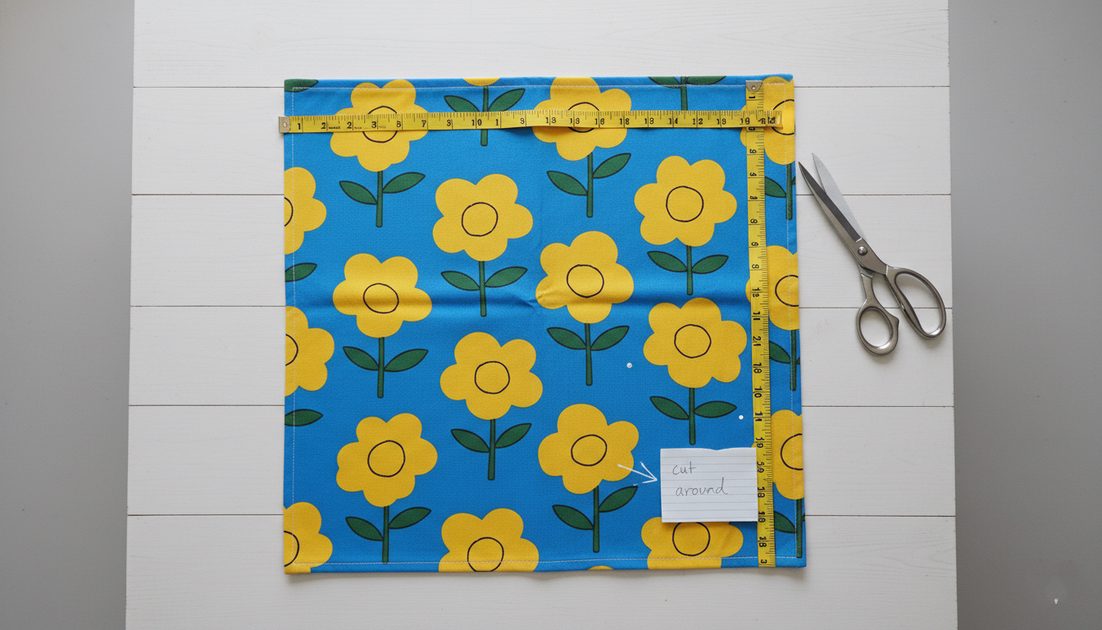
Small mistake: I didn't check for stains until I got home. There was a small faded spot near the hem. Almost invisible. I cut around it. Got lucky. Check yours before you buy.
What you need
One curtain panel (or two if you want extra fabric for pockets)
Scissors (sharp ones)
Measuring tape
Pins
Sewing machine (hand sewing works too, just takes longer)
Thread that matches or contrasts – your call
I used white thread because I ran out of blue. The stitches show. I actually like how it looks now.
The pattern (super simple)
No fancy cutting. No weird shapes.
Step 1: Lay the curtain flat. Cut a rectangle 28 inches wide by 30 inches tall. This fits me (size medium, 5'6"). If you're taller or shorter, adjust. I guessed this measurement and got lucky.
Step 2: Fold over the top edge 1 inch. Then fold another 2 inches. Pin it. This creates the tunnel for the neck strap.
Step 3: Fold both side edges 1 inch. Then fold another 1 inch. Pin. This stops the fabric from fraying.
Step 4: For the waist ties, cut two strips 3 inches wide by 30 inches long from leftover curtain fabric. Fold each strip in half lengthwise (right sides together). Sew along the long edge. Turn inside out. Iron flat.
Step 5: Sew the top tunnel closed (leave the ends open for the neck strap). Sew the side hems. Attach the waist ties to the sides – about 6 inches down from the top.
Here's where I messed up: I attached the waist ties too low. They hit my hips, not my waist. Had to rip the stitches and move them up 4 inches. Annoying. Learn from me – pin them first and try the apron on before sewing.
The neck strap
I didn't have extra curtain fabric left. So I used an old shoelace.
Not kidding. A clean white shoelace. Threaded it through the top tunnel. Tied a knot at each end so it wouldn't pull through.
Does it look professional? No. Does anyone notice? Also no.
What I'd do differently
Measure the waist tie placement before sewing. Every time.
Use contrasting thread on purpose instead of running out of matching thread.
Add a pocket next time. I meant to. Forgot until the apron was finished. Now I'm too lazy to add one.
Total cost
Curtain: $4
Thread: already had
Shoelace: free (old pair)
Time: about 90 minutes, including fixing my mistake
4 for an apron that would cost4foranapronthatwouldcost30-40 at a store. And I actually like wearing this one because I made it.
Will I do this again?
Yes. I'm already looking for more ugly curtains. Next time I want a grocery bag. Or maybe a gardening apron with pockets.
The best part? If I mess up, I'm out $4. That's a lot less pressure than cutting into expensive fabric.
Try it. Find the ugliest curtain at your thrift store. Bring it home. See what happens. Worst case, you learned something for $4.

No comments yet — be the first to share a thought.